Diagrams For Building 16x8 Pallet Outbuilding - Find Out Vital Solutions To Make A Shed Easily
After that a thinner fabric layer was placed. Pre-drill wooden components before driving in the galvanized screws, to prevent lumber from splitting. However, it's important to check with your town, because every city has different rules and regulations, and we recommend erring on the side of caution. Years down the road, sliding doors won't sag and stick the way swinging doors do. These boards should be set in 2 feet from each side of your (https://shedconstructionplans.com/6x6-gable-shed-plans-blueprints) square. Afterwards, you need to take care of interior of tiny house. The first decking edge should overhang the deck frame by half an inch.
Instead, you could make a storage shed that will contain the space to neatly organize gardening equipment and yard tools which would also increase value of property. In this case, a gusset plate is often used to reinforce connection. For windows, you have another choice, opening windows or permanently shut windows. A ladder leaned up on roof makes a good scaffold. Nail 2-by-4 lumber between the top and bottom chords of trusses, flanking bottom and top of chimney. It is fixed to vertical board siding and the edge of the jamb. Cover the barrier with gravel and spread it out evenly with a shovel and metal garden rake.
Once you have dug out that trench for pipe you should lay down landscape fabric and then drain tile then gravel to hold it down in the trench. You need to tie extension into the end of existing wall, as well as ceiling and floor. Both ends of the roof rest on top plates, so marking and cutting rafters is easy. We chose exterior (find out more) materials that'll keep this shed looking great for decades. Then cut inside uprights from 2-by-2's to the correct length and fasten siding piece down over the uprights. Cut and dry-fit lumber, making sure the distance between the jack studs is correct for the door casing.
These two are built the full width of the floor, so exactly 8 feet wide. To left of this figure end of the burlap sheet would be wrapped around end rafter and stitched to rafter. The door of outbuilding is built to look like the entire front facade of house, complete with stucco, windows, entry way, stoop, and concrete steps. This makes for an ideal horse run in shed, or you can store your atv, your small tractor or other items. Building this shed isn't difficult, but it does require a little carpentry experience. You can use surface of your outbuilding floor to create either wall first.
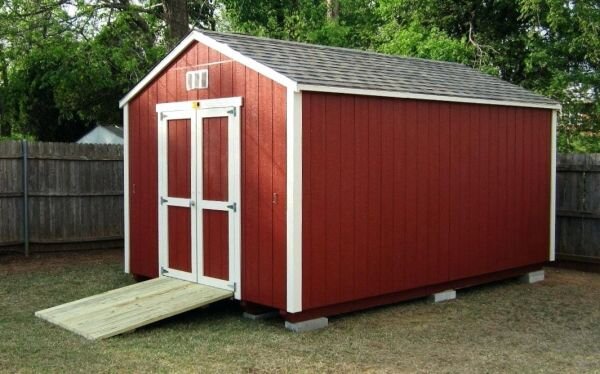
There are different ways you can finish base of the outbuilding and skirting if used. Even complicated roofs are combinations of basic roof styles. Ours also sits on ground, not concrete. The right spacing depends on the code requirements, as well as type of structure it is and the weight it would bear. In many plans, headers are positioned against the top plate. The front door is a steel entry door purchased at a home center. It is angle chop where it meets rafters. Using pavers places the entry close to, or on the ground so good for riding lawn mowers or quads.
The rear wall has no openings, leaving plenty of wall space for hanging tools and installing shelves. Then erect and install the remaining trusses, anchoring the end truss again with a temporary 2-by-4 brace to end girts. The same practice is done with the screwing but you will definitely need more than one person to do it and you could find out why for yourself. Install only the outer posts closest to outbuilding for now. Once you have all 4 sides measure from opposite corners to craft an x shaped measurement. Here are some excellent tips taken from our pros' 50 years’ worth of experience in designing yard sheds.
Overlay particle board on each assembled frame. Some builders run additional strips horizontally at top and bottom of the wall. Lay the sheets to the roof of the firewood shed, making sure you align all edges. That is why you must be careful with the joist span. You may cantilever a floor joist not more than depth of the joist. We were able to raise and level his 12'x24' shed using bottle jacks. Drill pilot holes before inserting screws, in order to get the job done in a professional manner. Fasten the lower girts in place, making sure they are level.
We constructed our door from the same boards as our sheathing, and we made sure to ship lap vertical boards.