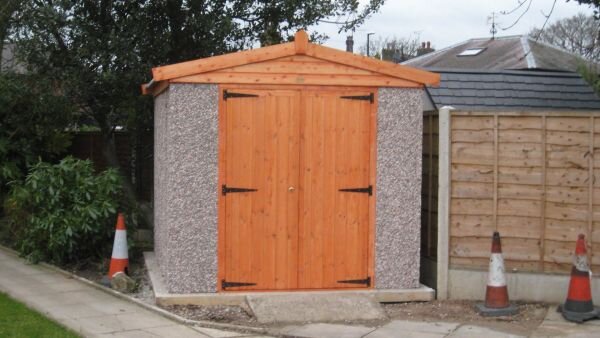
Blueprints For Crafting 16x8 Tool Outbuilding: Unearth Amazing Truths For Making A Shed Accurately
The pallet boards were then trim to meet the full dimensions needed for the door, minus the metal sheets dimensions. Work with great attention and good judgement, if you want to obtain a professional result. French door and Hardie board siding were most expensive items on project. In a standard interior wall, correct stud spacing is essential. It's hard enough to get a project like this finished in your spare time let alone a project with incomplete blueprints. However we would probably want to eventually move this shed (https://shedconstructionplans.com/8x10-garden-storage-potting-shed-plans-blueprints) to work on retaining wall behind it so we wanted to keep our foundation moveable.
A strong prevailing wind or gusts usually means a lower slope windward to reduce wind force. Therefore, you should fill holes with lumber putty and let it dry out for several days. Fix 25mm thick board to trimmer studs and header in the rough opening. Leave off end skirt board until the siding is installed and doors are slice out. If you are like me, you probably have a reasonably good idea of how to create most of your shed. What you need is a sturdy storage house that hides your waste while keeping it organized. Unbraced studs can flex, warp and twist due to age and years of foot traffic on floor above.
Another consideration is what you plan to use the outbuilding for. It is a permanent foundation, so mistakes are permanent. Smaller sheds are lighter, especially if made of plastic or light (additional hints) steel. There may be a few things that you don't have to do, but floor is certainly one of those you need to pay closer attention to. If necessary place a concrete block under each skid every 48 inches or less. Then place some plastic down to help waterproof your shed, then lay your pavers on top. If you live in a cold-weather region, you might be required to dig down to the frost line and pour concrete footings or piers.
There's old saying of measure twice and slice once. Fasten the four end studs of each side wall to the bottom plate, Install these assemblies. Set a concrete block 6 inches in from ends of your skids. They have to take them with them when they leave unless someone asks for them and they are always happy to give them away. Install tongue and groove sheets, otherwise the floor won't provide enough support to store heavy items. Mark that spot and continue on to the next joist and the joist after that. Two sheets of galvanized metal roofing were applied and screwed onto the top for the roof.
There are three basic concepts in building a shed foundation, which include your location, constructing your frame and installing your floor. If you're building on a slab, use pressure-treated lumber for bottom plates. Before painting, we filled spaces on the exterior with acrylic caulk. Make sure truss is pushed tight against the siding and run a 3 inch screw through the bottom plate into truss on both sides of the stud. The same thickness as the rim joist to speed up process of floor framing. The aim is to assemble a box that is supported on every side, in order to contain the concrete that we will pour in during the next step.
Concrete piers are built by digging holes, inserting tubes, and pouring them full of concrete. If you live in an area with massive precipitations, this project is ideal for your needs. Once you have the measurements done, you can trim your board, duplicate on a second board, and you will then have a complete truss or 2 rafter halves to nail to a ridge board. Contractors segment panels in all sorts of ways as needed and then discard what they don't use, which could be a substantial amount. Work with good judgement and craft sure the corners of the door are right-angled, using a framing square.
You may use solid full depth bridging, lumber or metal diagonal bridging, or other means to provide required floor joist bridging. Whether you're tying in new gable dormers or adding a chimney cricket during roof framing, giving the valley jacks a place to land is an easy task with these step-by-step instructions. Split truss with opposite edge of the sheeting and nail into truss at top corner. Find out where your septic access is and craft sure not to construct your shed over it. Mark the stud layouts onto the plates. There are many legal requirements that vary extensively according to your residence, so you should inform yourself.