Plans To Construct 4 x 14 Garage Outbuilding: Tasks To Look at While Making A Garden Shed

Make sure end struts are flush with the frame. To do this, put in the materials in correct ratio as above into mixer. If you familiarize yourself with components that construct up the rafter it should assist you in this roof framing task. Support each corner and every 6' to 8' on perimeter and through the middle area. Note wire should have at least 400-600 pounds of tensile strength. Then hang the door and install the hook. Design and support (https://shedconstructionplans.com/8x8-gambrel-roof-storage-shed-plans-blueprints) the ridge as a beam and design the walls supporting the ridge board to bear the ridge board load, when framing cathedral and vaulted ceilings without ceiling trusses and rafter ties.
Use a framing square to lay out the cut based on the roof slope. Install the brackets tight to underside of the overhang, and then notch the fascia board to fit over them. Use batter boards and string to lay out posts in a professional manner. Few readers were concerned about a possible gap between the top of walls and roofing of the roof. Your question would appear on a Web page exactly way you enter it here. Erect wall, and nail temporary 2-by-4 braces on the end studs, pointed toward the ground. Concrete piers are built by digging holes, inserting tubes, and pouring them full of concrete.
Screw through the window frames into spacers to hold windows together. Cut particle board shelving and screw it down. Then add the second rim joist and install joist hangers (advice) on every joist. For strength, plan to build the front and back layers so the corners overlap each other. Align the sheets at top edge of plate and lock it into place with finishing nails. Raise the hanger until bottom of the hanger is seated against the bottom of joist. Set 4 corner stakes, ensuring the corners are square. However, what you save with furring strips is balanced by cost of insulation.
Long screws are used to fasten log frame together. Lay two boards length of the wall together on a flat surface, with the 2-inch faces up. We however had a pile of pier blocks that were dying to be used for something like this. A nailer strip is a board running perpendicular to the rafters that tin sheets are screwed too. Plus, having to constantly move ladders around is time consuming. At a window, install angled sill piece first, then the top jamb, then side jambs. These narrower struts allow the tongue-and-groove ceiling to recess into the roof for a more elegant look.
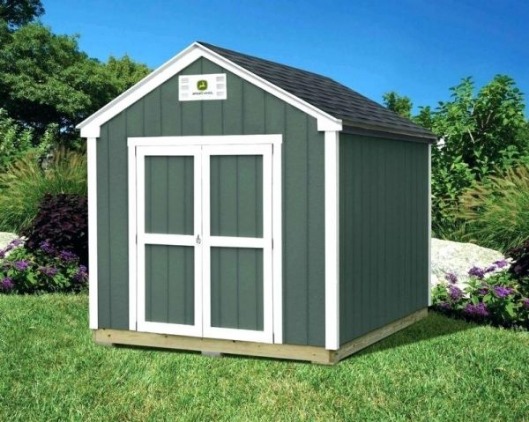
This step by step DIY woodworking project is about DIY outbuilding plans. In front, we installed some gable trim in order to keep water off of the trim board and provide a nice red band along front of the shed. Now that the roof has been fixed, you can slice the walls to locate shed windows and recessed storage boxes. However, by fixing the bracing to the outside of door does have its advantages. In addition, now it is the right time to make the side overhangs. In both cases, this would have added to cost, and my desire was for an economical, easy-to-drive-into shed.
This would craft it very easy once you hang joists to frame. Sturdy metal hardware takes place of traditional, time-consuming timber-frame joinery in this contemporary take on classic storage shed. A strong, well-constructed joist system will provide a solid floor foundation for decades. The paper backing faces room interior with edges stapled to studs. Proper flashing is crucial at a roof-to-wall intersection. Homeowners complain about having too much storage space about as often as they do about having an overabundance of cash. The steel ribs also connect with steel eaves that the roof panels attach to. Protecting your car from weather and wind-blown debris is probably a priority for you, and if you don't have a garage, a carport might be a satisfactory solution to your car-protection problem.
The shed shown is permanent, not movable, so it may be subject to additional permits and regulations. In addition, create sure size of the overhangs fit your needs, as later will be impossible to change something. The user of this design could use their own ideas and resources available, as more appropriate nails and ties will craft your own results much sturdier. It calls for 40 more 2x4x8 pieces of lumber. Consult the local building department regarding size of ledger and joists, as well as the spacing of joist hangers. We wrapped outbuilding in some leftover Tyvek house wrap that was excess from another project, but tar paper is generally cheaper and more readily available.